
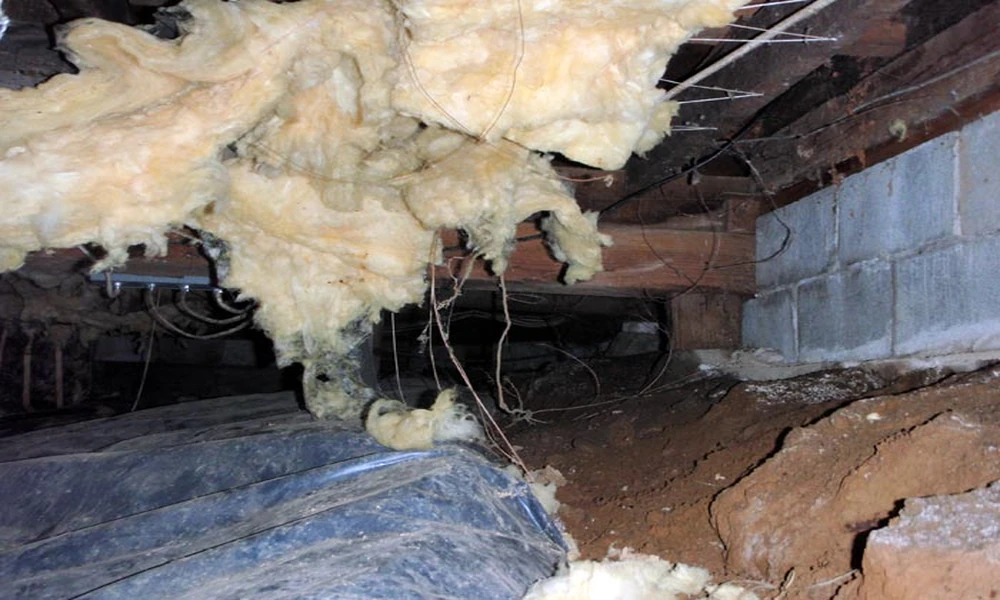
A house can smell damp for months before anyone thinks to look underneath it. The odor drifts up through floor vents and gaps around pipes, so people blame the carpet, the laundry, or the basement they don’t have. Meanwhile the real source sits a few feet below the floorboards in a space most homeowners have never entered. Crawl spaces are one of the most common places for hidden moisture, and the clues usually show up long before the problem does. Here’s how to follow them.
The clues upstairs
Start with what you can notice without going anywhere near the crawl space. A musty or earthy smell that’s stronger on the main floor or after rain is the classic sign. Floors that feel cold or slightly soft, doors and windows that stick in humid weather, and condensation on the inside of windows all point to extra moisture in the home.
Also watch for pests. Insects, rodents, and termites are drawn to damp wood, and an increase in any of them can be an indirect sign of what’s happening underneath. If anyone in the household has allergy or respiratory symptoms that seem worse indoors, that’s another reason to look into it.
What a professional looks for
Crawl spaces are cramped, dirty, and sometimes hazardous, so inspection is often best left to someone with the right equipment. A restoration company such as A1 Restoration can look at the space, measure humidity and wood moisture with proper meters, and explain what’s causing the problem. Ask them to take photos of anything they find, and to show you where the moisture is coming from instead of just telling you it’s there.
A good assessment covers the soil, the foundation walls, the vents, the insulation, the ductwork and plumbing in the space, and the underside of the floor. It should end with a written explanation of what they found and what they recommend, in order of priority.
The three sources of moisture
Moisture gets into a crawl space in three main ways, and fixing the wrong one wastes money.
Ground moisture. Bare soil releases water vapor constantly, and a crawl space with a dirt floor is a common site of hidden mold. The soil gives off moisture, the warm air picks it up, and the damp air settles on the wood above.
Humid air from outside. Foundation vents were once considered the standard solution, but they can backfire. The Department of Energy’s article on unvented crawlspaces notes that crawlspace venting is a widely accepted practice, yet in humid climates, the warm humid air entering the crawlspace is more likely to condense on crawlspace framing than to help dry it out.
Water from leaks and drainage. Plumbing leaks, poor grading, clogged gutters, or groundwater can put liquid water in the space. This is a different problem from humidity and needs a different fix, such as repairing a pipe, redirecting downspouts, or adding drainage.
What the fix usually looks like
The right solution depends on what the assessment finds. In some cases, it’s as simple as fixing a leak, redirecting water away from the foundation, and drying the space out. For persistent humidity, many contractors recommend a sealed or encapsulated crawl space: a heavy duty vapor barrier over the ground, sealed at seams and run up the walls, closed vents, insulation along the foundation walls, and some form of humidity control. The Department of Energy describes unvented, insulated, conditioned crawlspaces as performing well in terms of safety, health, comfort, durability, and energy consumption, and notes that the crawlspace floor should be covered with a ground cover that is overlapped and sealed at the edges.
Ask for the plan in writing, including the materials, the thickness of the vapor barrier, how seams and penetrations will be sealed, and what happens to wet or moldy insulation and wood. Ask also how the space will be kept dry afterward, since a barrier without humidity control may not be enough.
After water gets in
If the crawl space has flooded or a pipe has leaked, speed matters. Wet building materials generally need to be dried within one to two days to avoid mold growth, according to EPA guidance, and restoration crews often use fans, dehumidifiers, and other equipment to dry things quickly. Wet insulation that can’t be dried in place usually has to be removed. The longer moisture sits, the more likely it is that you’ll be dealing with mold and wood damage instead of just wet materials.
Safety and what not to do
Crawl spaces have low clearance, uneven ground, sharp objects, and sometimes exposed wiring or standing water. Don’t go in if you see water near electrical components, if you smell gas, or if you aren’t sure what’s down there. If you do look, wear protective gear, including a respirator, gloves, and eye protection, and tell someone where you are.
Avoid quick cover-ups too. Spraying a bleach solution or putting a vapor barrier over wet soil doesn’t solve the moisture problem and can seal in the cause. Find the source first.
Putting it together
A musty smell is rarely about the thing you smell. It’s usually a symptom of moisture that has found a home somewhere out of sight, and crawl spaces are a likely spot. Follow the clues, get the space inspected, understand which of the three moisture sources is at work, and choose a fix that addresses it directly. Dry space, sealed barrier, controlled humidity.
Handled early, this is a manageable project. Left alone, it becomes a slow expense that grows with every humid summer and every rainy spring. The best time to look underneath is before the smell tells you that you should have.